Saab 9-3 MK2 Phone Button Steering Wheel Interface Installation
This is performed when replacing the factory fitted stereo with an aftermarket unit or adding a Parrot Bluetooth handsfree car kit.
The same process is used with the Saab steering wheel interface when replacing the factory stereo and also when installing the Parrot UnikaGMlan steering wheel interface for the Parrot MKi series Bluetooth handsfree car kits.
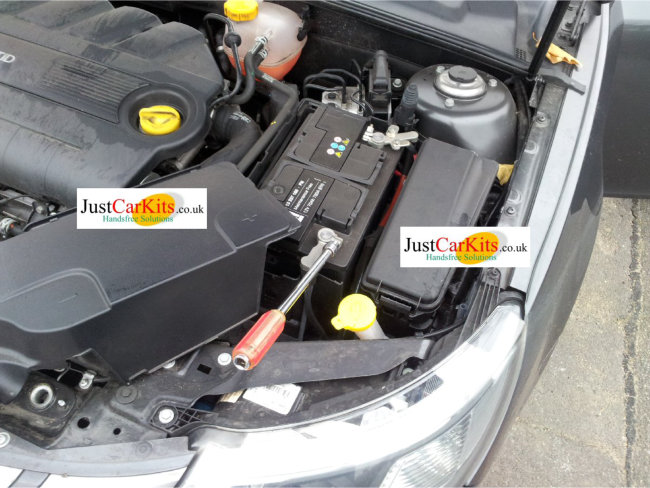
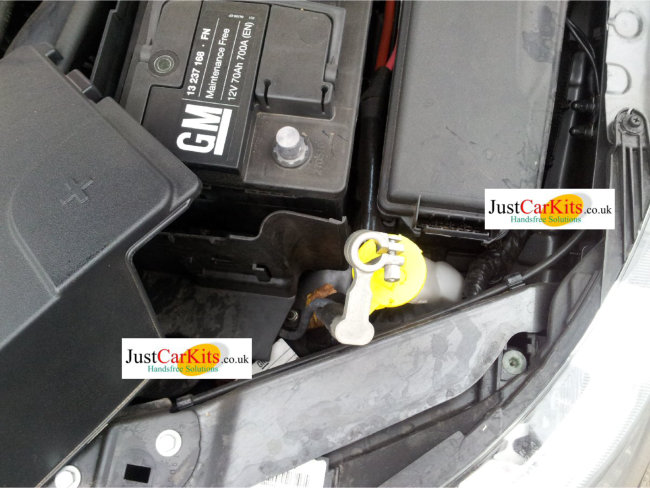
Before doing anything, turn on the ignition and wind one of the front windows down (or both).
To install the steering wheel interface you must first disconnect the negative terminal on the car battery.
The cover is released by turning the 2 locking tabs at the front of the cover (use a 5p piece). After doing this, simply remove the cover.
After removing the negative battery terminal (10mm bolt) push the battery lead out of the way to prevent it making a re-connection.
Wait a couple of minutes before releasing the steering wheel harness.
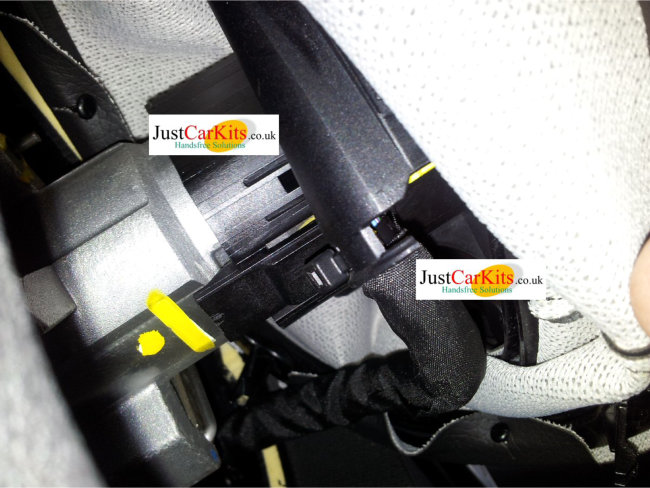
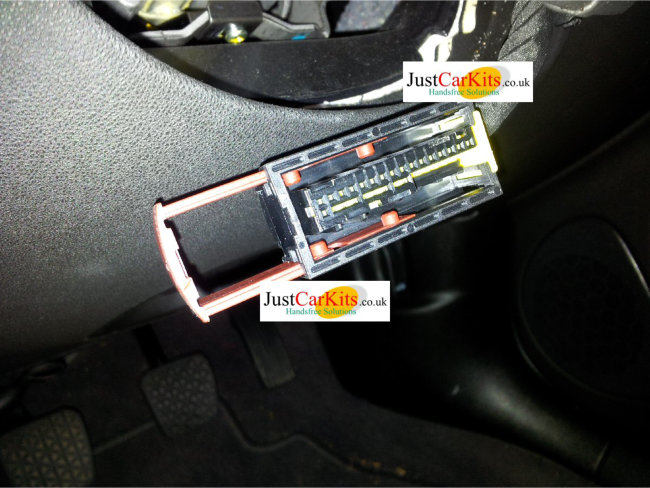
To gain access to the steering wheel harness release the locking bar underneath the steering wheel. Then pull the steering wheel towards the driver and lock back in place.
Unclip the fabric shroud where the steering wheel joins the dash – it can be pulled in the direction of the driver. With this undone push the cover back over the steering wheel to reveal the steering wheel harness connector.
The steering wheel connector is dis-engaged by sliding up the red locking bar. To do this, hold the steering wheel harness whilst pushing the red bar upwards. At the same time gently wiggle the wiring harness as this will make it easier to dis-engage.
It is not easy to see where the locking bar is located and it is better to do this by “feel”.
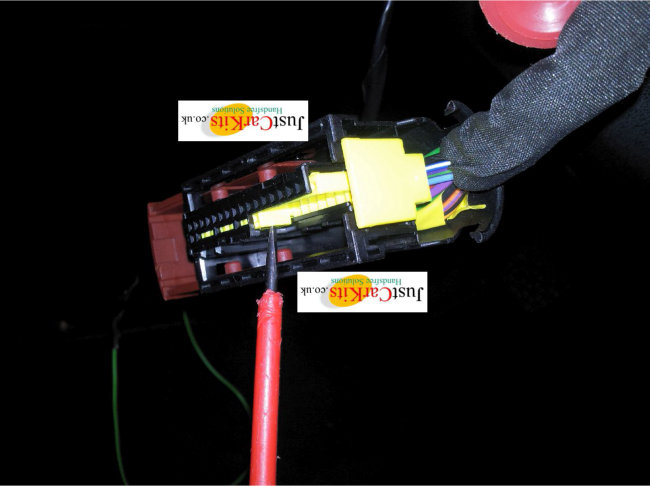
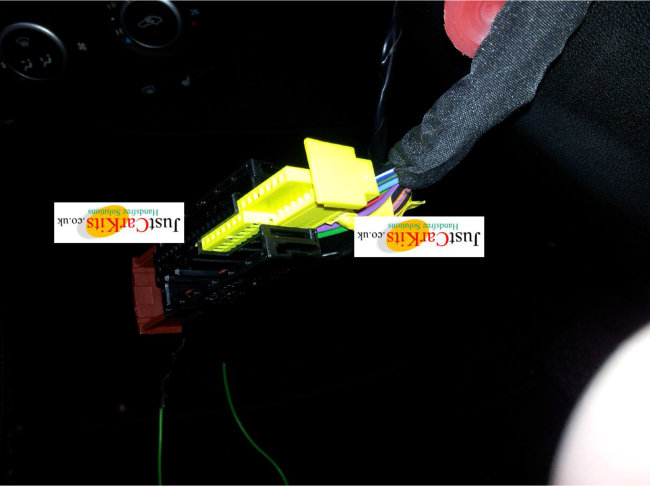
With the steering wheel connector released the next task is to separate the yellow connector bar from the main housing. It is a bit tricky.
There are 2 locking tabs that need to be pushed down whilst withdrawing the yellow connector block from the housing cover. Use a small screwdriver whilst pulling the wiring harness.
When the tabs have been pushed down the yellow connector block will now slide out.
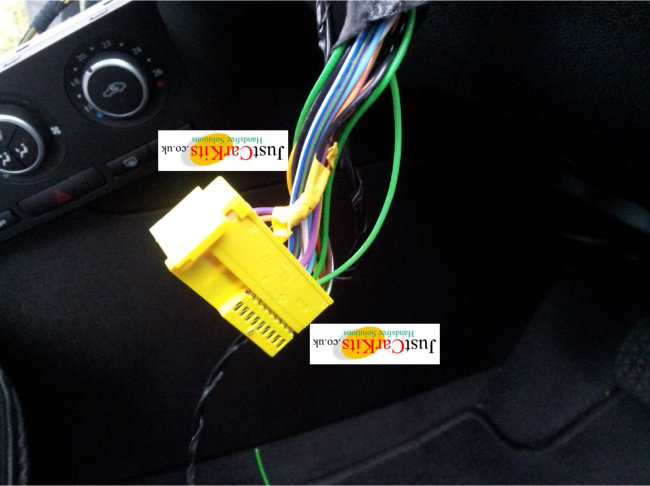
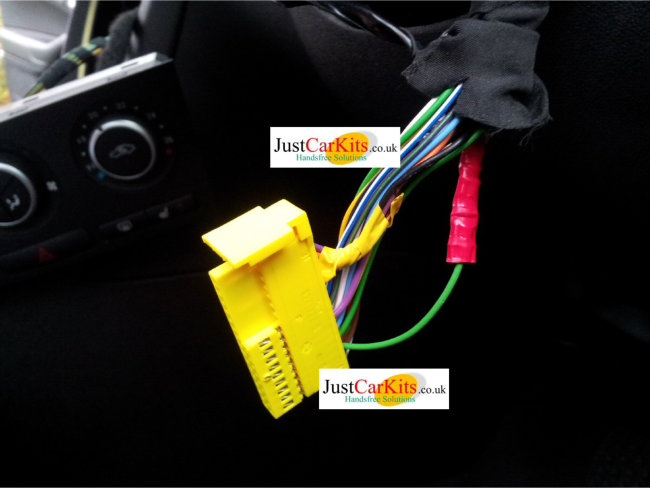
With the yellow connector block now separated, undo some of the wire insulation to expose the wires in the harness. The outer insulation is stuck together and can be gently separated.
The connector block is numbered. The green steering interface wire needs to be connected to pin 19. This is also a green wire on the Saab wiring. Locate pin 17 (it is numbered) and count 2 up from this pin on the same row.
Connection to the green wire on pin 19 must either be crimped or soldered. Do not be tempted to use a “tap-on” connector as these are unreliable.
Once the connection is made, re-insulate the wiring and run the green wire back to the steering wheel interface. Take care to avoid the adjustment mechanism underneath the steering wheel when routing the wire.
Now re-attach the steering wheel connector. Before attaching the connector pull the red locking bar fully out.
Guide the connector to the socket on rear of steering wheel and push down. The locking bar will engage and then push the locking bar fully down to lock the connector in place.
When you have confirmed that the connector is in place, re-connect the car battery.
Lock and then unlock the car and insert the key and turn ignition on. You may need to remove and re-insert the key if the immobiliser does not dis-engage.
You will now need to configure the steering wheel interface – see notes below.
JCKFK-311 and jck29-uc-050-saab
It is necessary to now configure the steering wheel interface for use with your new stereo.
- If you have already connected the steering wheel interface to the power lead it should be unplugged again.
- Connect the patch lead to the the 4 pin plug on the wiring harness. The patch lead varies by manufacturer so ensure you have the correct one.
- Connect the wire from the steering wheel harness to the Green socket from the steering wheel harness.
- Apply power the steering wheel interface. The LED will give one Green flash. If you previously conneced the interface to the wiring at the rear of the stereo or used a different make of stereo you MUST reset the interface before proceeding. To reset the interface use the reset tool and insert into the hole next to the LED. Press on the reset switch until the LED goes out ( a couple of seconds).
- The interface now needs to be programmed to the stereo manufacturer – see separate instructions supplied with the interface. For Sony units you will also need to change a jumper position inside the interface, If you programme it incorrectly simply reset and programme again.
- After programming the interface, connect the stereo power lead and steering wheel input lead. Turn on ignition and the stereo should power up. The steering wheel interface interprets the bus signals to turn the stereo On/Off. If it does not and the LED is flashing RED check the connections to the Green wire again.
Parrot Unikagmlan
Connection of the unikagm must be done in this order:
- Disconnect power lead from the Parrot control box, if already connected.
- Connect the 4 pin plug from the Unikagm to the Parrot MKi9000 or MKi9200 control box. If you have an MKi9100 remove the link plug from the Unikagm harness and plug the MKi9100 display into this socket. Plug the unikagm 4 pin plug into the Parrot control box.
- Connect the Green wire from the Saab steering wheel connection to CAN(H) on the Unikagm harness
- Connect power to the Parrot control box.
- Turn on the ignition. The Unikagm will then programme itself to the vehicle bus signals. To indicate correct programming the LED will go Green. If you push the volume or phone buttons on the Saab steering wheel the LED will turn Yellow.
If the Unikagm LED has gone Green you have successfully installed it. If the LED stays flashing Yellow check the Green wire is connected to the CAN(H) wire or reset the Unikagm and the turn on ignition again.
See Unikagm instructions for how to operate it with the Parrot handsfree car kit.

Leave a Reply