
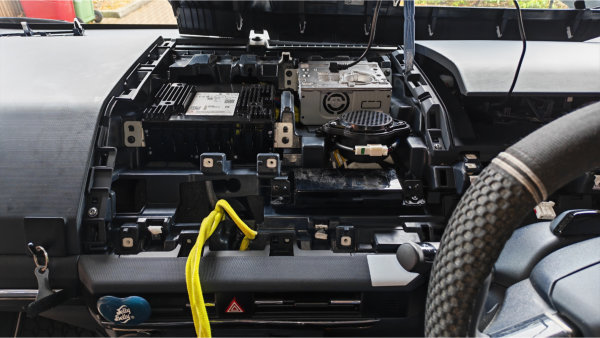
Kia PV5 Underseat Subwoofer Installation
Just a quick post regarding the installation of an underseat subwoofer in a 2026 Kia PV5.
The installation process is not particularly easy.
IMPORTANT: As this is an electric vehicle extra care must be taken. This post is for information only and assumes that you have required training and tools to work on vehicles with high voltage systems.
Before commencing work disconnect the High Voltage battery by removing the interlock. Remember to lock the interlock housing to prevent accidental re-activation of the High Voltage system. After HV disconnection wait 20 minutes to allow any charged circuit to discharge.
Never go near any of the ORANGE cables.
Undo negative terminal on 12V battery under the bonnet (10mm nut).
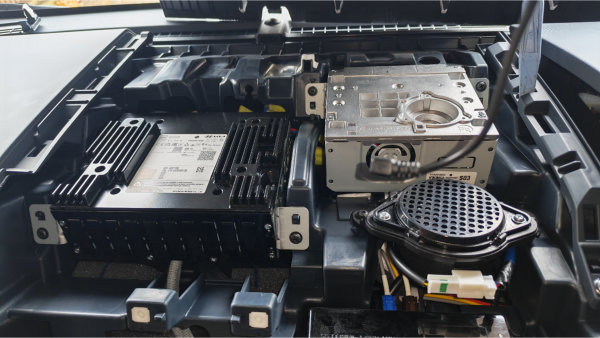
Stereo and control box Kia PV5
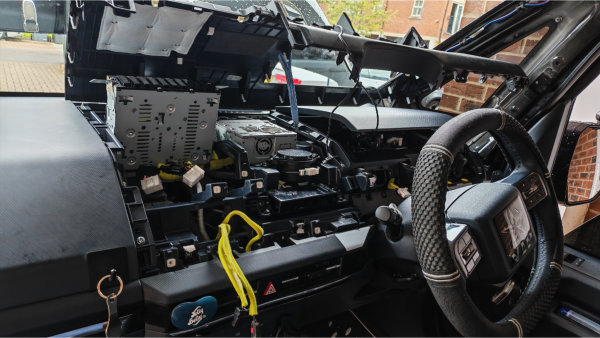
Dash panel removed to access stereo unit Kia PV5
We only took a limited amount of photos due to a lack of time but these will give you the general idea of how much needs to be removed / disassembled.
General disassembly instructions:
- Remove panel from behind main screen – it prises up. Use trim tool.
Undo 2 pozidrive screws holding screen and pull screen upwards. The bottom is held by 2 clips that will release as you pull it upwards. Disconnect screen connector and earth cable then remove screen. Remove other screws holding the top trim panel.
2. Remove panel behind speedo / info screen. Use trim tool.
Undo 2 pozidrive screws holding screen and pull screen upwards.The bottom is held by 2 clips that will release as you pull it upwards. Disconnect screen connector and remove screen.
3. Pull up panel on quick connect accessory connector to right of steering wheel (RHD) and undo all 6 screws.
4. Remove driver’s side A-Pillar trim (10mm bolt behind airbag label) and also remove grab handle 2 x 10mm bolts).
5. Remove driver’s side panel (top section ONLY) and remove 3 screws.
6. Undo screws holding driver’s knee trim. Prise top of panel away to give access to 2 screws holing the black trim panel in place. After removing this undo more screws that hold down to top trim panel.
7. Check that all screws holding top panel have been removed first. Gently prise up the top trim panel starting at front edge first. Be very careful as this is a polythene type plastic that marks very easily and will show stress marks if bent too much.
Note that the cubby hole with lid stays attached to the dash and the trim is on the front edge and around it. The trim is held with white polythene clips.
Once you have the trim lifted, you can gain access to the stereo. It is the black unit with fins on top and is held in with 2 screws.
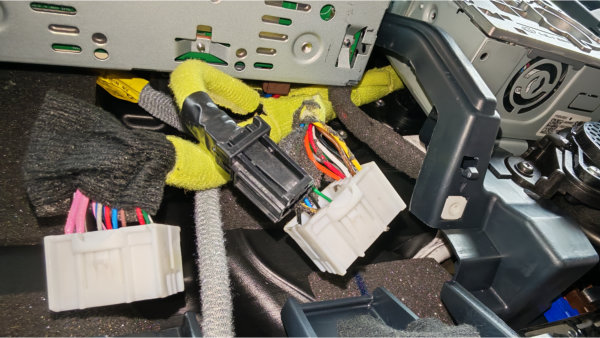
Stereo connectors Kia PV5
View of stereo Kia PV5

Leave a Reply